Lesson planPrint Lab: Lifting and Classifying Fingerprints with Cocoa Powder
Science45 minutesGrades: 11th
Overview
Dust, lift and classify real fingerprints with cocoa and tape.
Description
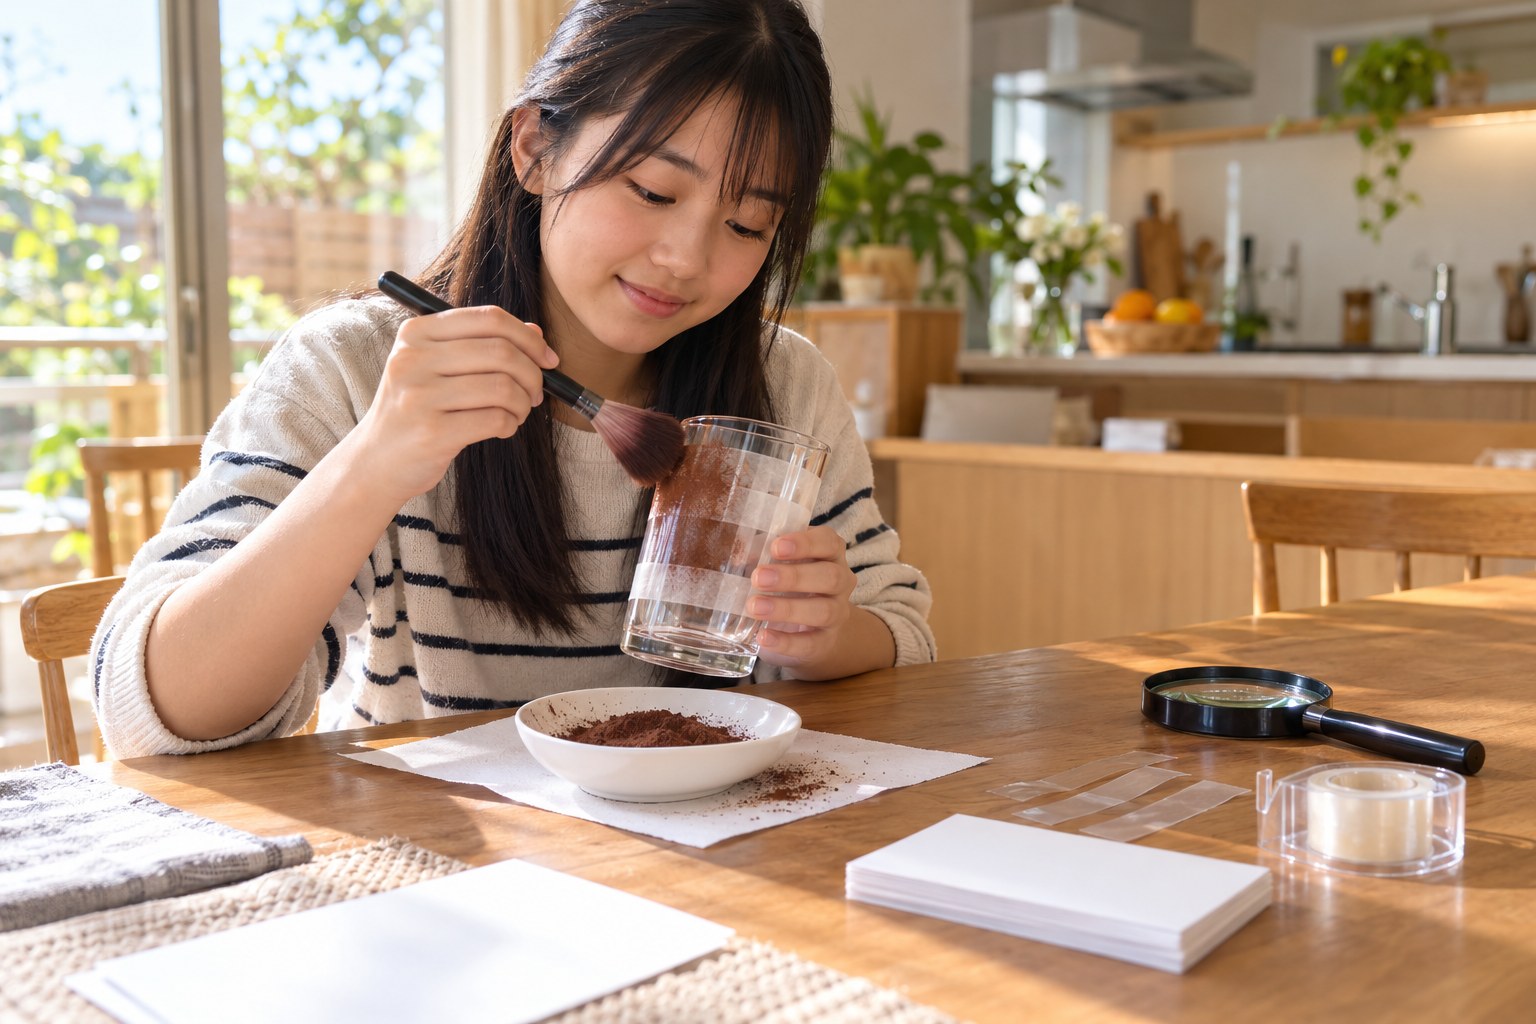
Your teen collects latent prints from family volunteers on a clean drinking glass, dusts them with cocoa powder and a soft makeup brush, and lifts them onto index cards with clear tape. They classify each print as a loop, whorl or arch, circle ridge endings and bifurcations with a magnifying glass, and run a blind comparison to see why real examiners need verification before calling a match.
Objective
Your teen will develop and lift latent fingerprints, classify them by pattern type, identify at least three kinds of ridge detail, and explain why fingerprint comparisons require independent expert verification.
Materials
| Item | Quantity |
|---|
| Clean, smooth drinking glass | 1 |
| Unsweetened cocoa powder | 2 tablespoons in a small bowl |
| Soft, clean makeup brush or large paintbrush | 1 |
| Roll of clear tape (about 2 cm wide) | 1 |
| White index cards | 8 |
| Magnifying glass or phone camera zoom | 1 |
| Fine-point pen | 1 |
| Paper towels | 4 sheets |
Vocabulary
Latent print
A fingerprint left by skin oils and sweat that is invisible until it is developed with powder, chemicals or light.
Loop, whorl and arch
The three main fingerprint pattern families: ridges that enter and exit the same side (loop), form circles or spirals (whorl), or flow across in a wave (arch).
Minutiae
Small ridge details, such as ridge endings, bifurcations (forks) and dots, that examiners compare between prints.
Bifurcation
A point where one friction ridge splits into two.
Verification
An independent re-examination of a fingerprint comparison by a second qualified examiner before a conclusion is reported.
Preparation
- Wash and dry the glass so it is free of old smudges, and spread paper towels on the table to catch cocoa.
- Ask 2 or 3 family members to volunteer one fingertip each; have them rub the finger lightly across their forehead or nose so it carries a little skin oil.
- Label 4 index cards with each volunteer's name and the finger used (for example "Mom, right index"), and keep 4 blank for the blind test.
Introduction
Hold the clean glass up to a window and ask: how many people touched this today? You cannot see a single print, yet every touch left a pattern no one else on Earth is known to share. Today your teen makes them visible.
Why might a print on a glass be more useful than one on a doorknob?
If two prints look alike to you, how sure would you need to be before you told a court they came from the same person?
Steps
1Step 1
Leave and develop the prints
(10 min) Each volunteer presses one oily fingertip firmly onto the glass and rolls it slightly, leaving prints spaced apart. Your teen dips the tip of the makeup brush into the 2 tablespoons of cocoa, taps off the excess, and twirls the brush very lightly over each print until the ridges appear brown; too much powder fills the ridges, so they build it up slowly.
2Step 2
Lift onto index cards
(8 min) Your teen presses a 6 cm strip of the clear tape over one developed print, smooths it with a fingernail to push out air bubbles, and peels it up in one steady motion. They stick each lift onto its labeled index card, so the 4 labeled cards each carry one known print.
3Step 3
Classify the pattern
(10 min) Using the magnifying glass or phone zoom, your teen classifies each lifted print as a loop, whorl or arch and writes the pattern on its card. They then find and circle with the fine-point pen at least one ridge ending, one bifurcation and one dot or short ridge on each print, labeling them RE, B and D.
4Step 4
Run the blind comparison
(12 min) Out of your teen's sight, one volunteer leaves a fresh print on the glass and you lift it onto one of the 4 blank index cards. Your teen compares it with the 4 known cards, first by pattern type and then by matching the position of at least five circled minutiae, and writes a conclusion: identification, exclusion or inconclusive. A second family member then checks the comparison without being told the answer, just as a verifier would.
5Step 5
Debrief on reliability
(5 min) Your teen reveals whether the verifier agreed and explains, out loud, one reason a real comparison could go wrong, such as a smudged partial print or knowing what answer the detective expects. On the back of the blind-test card they write one sentence on why labs now use independent verification.
Conclusion
Ask your teen: 'Which part of the process felt the most like science, and which part felt like judgment?' Real fingerprint work is both, which is why the field added verification and blind testing.
Make your own lesson plan in minutes
Describe a topic and Resource Portal AI writes the objectives, materials and steps for your group.
Try Resource Portal AI