Lesson planJunk Journal from Scraps: Hand-Binding a Paper Collage Book
Arts & Crafts60 minutesGrades: 11th
Overview
Bind a junk journal from paper scraps and make your first collage spread.
Description
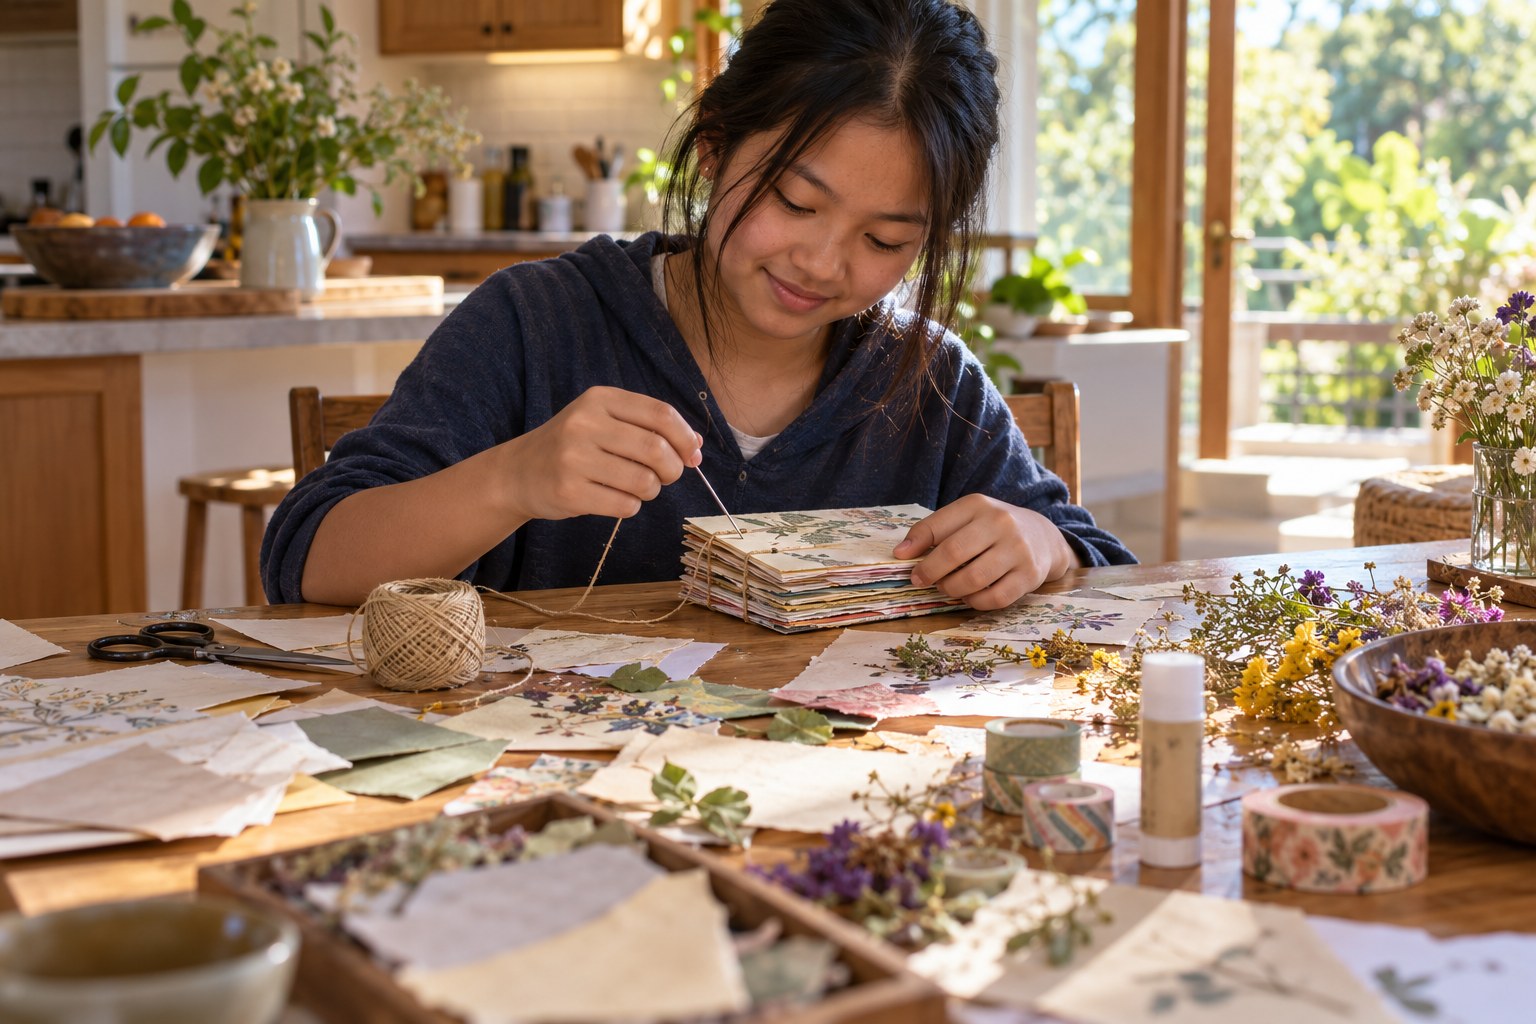
Your teen gathers paper ephemera such as old envelopes, receipts, tea-stained pages and magazine scraps, folds them into a single signature, and binds it with a three-hole pamphlet stitch using a needle and thread. They learn collage basics of composition, layering and color, and finish a first spread built around one memory.
Objective
Your teen will bind a simple booklet with a pamphlet stitch and design a collage spread using composition, layering and color.
Materials
| Item | Quantity |
|---|
| Assorted paper scraps (envelopes, receipts, old book pages, magazine pages) | about 20 pieces |
| Sheets of plain or kraft paper (letter size) | 6 |
| Cardstock or a cereal-box panel for the cover | 1 |
| Large sewing needle | 1 |
| Embroidery floss or strong thread | 1 yard (about 90 cm) |
| Thumbtack or awl | 1 |
| Glue stick | 1 |
| Scissors | 1 |
| Binder clips | 2 |
| Brewed black tea, cooled (optional, for staining) | 1 cup |
Vocabulary
Ephemera
Paper items meant to be used briefly and thrown away, like tickets, receipts and labels, often saved in journals.
Signature
A group of folded sheets nested together, the basic unit of a handmade book.
Pamphlet stitch
A simple binding that sews a single signature together through three or more holes along the fold.
Focal point
The part of a layout the eye goes to first.
Layering
Overlapping papers and images to create depth in a collage.
Preparation
- Tea-stain a few pages ahead if you want: brush or dab cooled tea onto paper and let it dry flat (an hour or overnight).
- An adult should supervise piercing holes; push the awl or thumbtack into the fold over a folded towel or old magazine, never toward a hand.
Introduction
Ask your teen to empty their bag, wallet or desk drawer of receipts, tickets and wrappers. Tell them that's not trash: it's the start of a journal.
What memory from this year would you want to save on paper?
Have you seen junk journals or scrapbooks online?
Steps
1Step 1
Sort and choose the papers
(8 min) Your teen spreads out the 20 or so assorted paper scraps and sorts them by color and texture, picking a palette of three or four main colors. They set aside the scraps tied to one memory, like a concert ticket or a trip.
2Step 2
Fold the signature
(7 min) Your teen folds the 6 sheets of plain or kraft paper in half, nests them inside each other, and wraps the folded cardstock or cereal-box cover around the outside. They line up the edges and hold everything with the 2 binder clips.
3Step 3
Pierce the holes
(5 min) With the signature open to the center and resting on a folded towel, your teen marks three holes along the fold: one in the center and one about 1 inch (2.5 cm) from each end. With an adult watching, they push the thumbtack or awl straight through all layers at each mark.
4Step 4
Sew the pamphlet stitch
(10 min) Your teen threads the large sewing needle with the 1 yard of embroidery floss and sews the binding: from inside out through the center hole, in through the top hole, along the inside and out through the bottom hole, then back in through the center hole. They tie the two tails in a square knot around the long inside stitch and trim the ends with the scissors.
5Step 5
Learn collage composition
(8 min) Read the collage notes in the extra sections together. Your teen arranges the memory scraps set aside from the 20 or so assorted paper scraps on the first two-page spread without glue, trying at least two layouts, and picks one with a clear focal point and some empty space.
6Step 6
Glue the first spread
(22 min) Your teen glues the background papers first with the glue stick, then the middle layer, then the focal item, trimming with the scissors as needed. They add a handwritten line or date about the memory and close the journal under a heavy book to flatten.
Conclusion
Ask: what's the focal point of your spread, and why did you choose it? Each new memory can get its own spread.
Make your own lesson plan in minutes
Describe a topic and Resource Portal AI writes the objectives, materials and steps for your group.
Try Resource Portal AI